Menu item shortcut windows
Menu item shortcuts allow one menu item to be accessible in different menu groups at a terminal. A shortcut for a timed service menu item can be associated with a table, whereas the menu item itself cannot.
Windows used with menu item shortcuts:
The editor window is opened by the command from the context menu of the directory when or menu item shortcuts are selected.
Editor window
The editor window is used to edit a single menu shortcut.
The editor window always contains the panels Properties, Picture, IDs, Price scheduling.
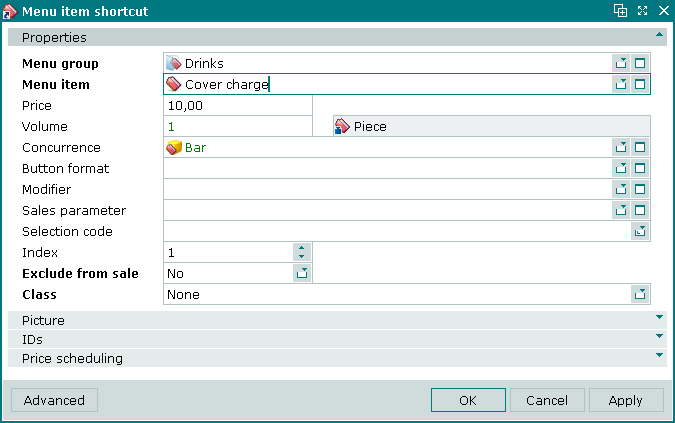
Menu item shortcut editor window for a simple service
Properties panel fields:
-
Menu group — name of the menu group that the shortcut is included in. Required field.
-
Menu item — name of the menu group that the shortcut links to. Required field.
-
Price — price at which the menu item shortcut is to be sold. If this field is left empty, it will be sold at the price specified for the menu item itself.
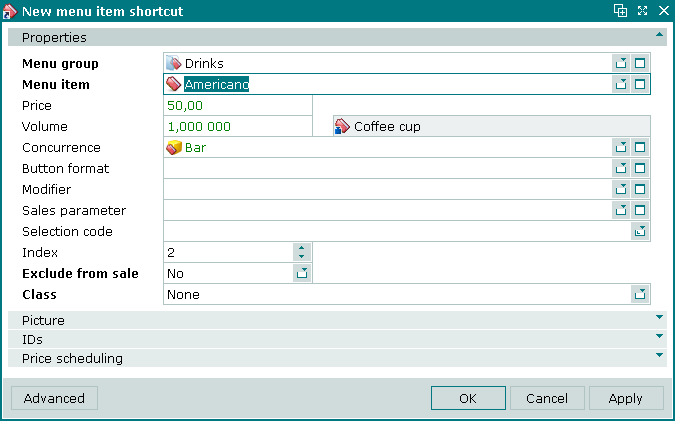
If the price entered in this field is the same as the price of the menu item itself, the price is highlighted in green.
Setting different prices for menu item shortcuts allows the same menu item to be sold at different prices in different locations.
-
Volume — volume of 1 portion of the menu item that will be added to an order when the shortcut is selected in the terminal menu. If no value is entered, the volume specified for the menu item itself is inherited.
If the volume entered in this field is the same as the volume of the menu item itself, the volume is highlighted in green.
-
Unit (menu) — name of the menu item unit of measurement. This field is read-only. Field name is not displayed.
The field displays the value entered in the Properties panel of the window.
The volume of the menu item shortcut will be defined in the unit of measurement specified for the menu item itself. This field is read only and no other unit of measurement can be selected.
-
Concurrence — name of the concurrence.
-
Button format — format of the button used to select the menu shortcut in the terminal menu.
If no button format is specified, the button format is inherited from the menu item itself.
-
Modifier — name of the modifier for the menu item.
If no modifier is specified, the modifier is inherited from the menu item itself.
Selection is made in the window.
Shortcuts can have different modifiers from their menu items, so for example adding a cup of coffee to an order by selecting its menu item could add it with white sugar as a modifier, and there could also be a shortcut to add the same cup of coffee but with artificial sweetener as its modifier.
-
Sales parameter — sales parameter used when selecting menu item shortcut on the terminal.
If no value is entered, the sales parameter specified for the menu item itself is inherited.
-
Selection code — code used to select menu item shortcut on the terminal.
If the shortcut code is not specified, the menu item code is not applied.
-
Index — incremental value (whole number) which determines the position of the menu item shortcut in the menu at the terminal. The default value of this field is the highest index number in the group plus one.
-
Exclude from sale — whether to temporarily exclude menu item shortcut from the group.
The value is selected from No or Yes.
Excluding the shortcut from sale does not affect the menu item itself.
-
Class — menu item shortcut mode.
Selection is made from Stock item, Timed service and None.
When Stock item is selected in the Class field, the Stock item panel is added to the window.

Menu item shortcut editor window for a menu item
When Timed service is selected in the Class field, the Price scheduling panel is added to the window.

Menu item shortcut editor window for a timed service
Selecting will add the item to the directory and close the entry window. Selecting will close the window without saving the item. Selecting will add the item to the directory without closing the window.
Multiple editor window
When two or more menu item shortcuts are selected for editing, the multiple editor window will open. It has a panel displaying a list of the selected menu item shortcuts. The title in the window header is .
The editor window contains only the panels that are common to all selected menu item shortcuts.

Multiple menu item shortcuts editor window
When multiple menu item shortcuts are selected for editing, any changes that are saved will be applied to all of the selected menu item shortcuts.
The panels and fields are the same as in the editor window.
Entry window
The entry window is used to add a shortcut for menu item that is already in the directory.
The window is opened by the command from the context menu of the directory.
Menu item shortcut entry window
The panels and fields are the same as in the editor window.
Picture panel of the Menu item shortcut window
The Picture panel is used to select an image that will be displayed in the menu on the terminal.
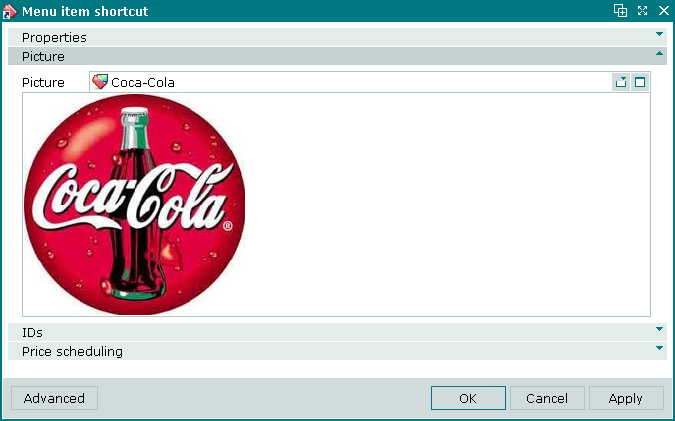
Picture panel
Selection is made from the directory.
The Picture field displays the name of the selected image, with the image itself displayed in the space below it.
The name of the selected image is displayed in the directory.
The image is displayed in the menu and in orders on terminal and PDA screens.
IDs panel of the Menu item shortcut window
The IDs panel contains a list of IDs that are assigned to the menu item shortcut.
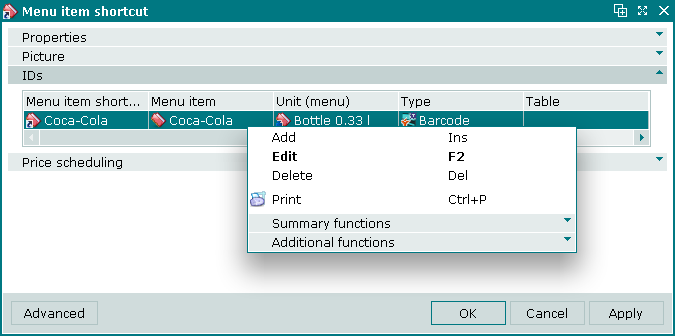
IDs panel of the Menu item shortcut window
IDs data grid:
-
Menu item shortcut — name of the menu item shortcut. Corresponds to the name of the menu item. If the menu item is a timed service and is associated with a table, the name of the table is displayed here.
-
Code — identifier code.
-
Quantity — number of portions of the menu item shortcut that the ID represents.
-
Volume — volume of the menu item shortcut that the ID represents.
-
Unit (menu) — unit of measurement used for the menu item.
-
Table — name of the table (or location) where the timed service is provided. Displayed only for shortcuts to timed services that are associated with a table.
-
Type — ID type.
-
Mask — flag for using ID code mask.
-
Comment — short comment.
-
Menu item — name of the menu item that the shortcut relates to.
Context menu commands:
-
— add a menu item ID.
-
— edit a menu item ID.
The command is available only for filled in specifications.
-
— permanently delete menu item id from the list.
The command is available only for filled in specifications.
-
— print out.
-
— contains additional commands for working with data grids.
Menu item IDs are added using the window. The and windows are used for editing.
The permanent delete confirmation prompt is used when deleting menu item shortcut IDs.
Price scheduling panel of the Menu item shortcut window
The Price scheduling panel is used to create and edit price schedules for the menu item shortcut. Price schedules allow the price of the menu item shortcut to change, or for the menu item shortcut to be made unavailable, at different times of day.
The panel is empty by default. The price schedule is only saved if the price of the menu item shortcut was changed or its sale was limited to certain time intervals. Otherwise clicking or empties the panel.
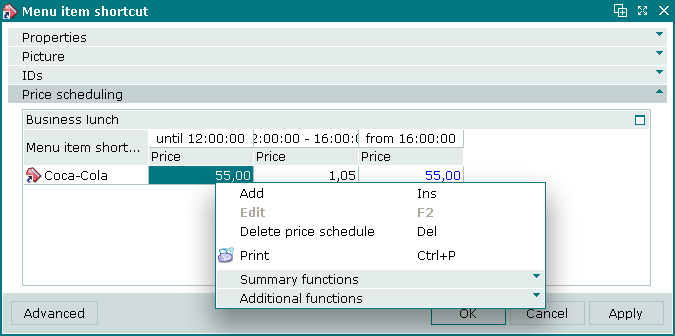
Price scheduling panel context menu
The Price scheduling panel context menu contains the following commands:
-
— add a menu item shortcut price schedule.
-
— edit a menu item shortcut price.
This command is only available in populated data grids.
-
— permanently delete price schedule from the list.
-
— print out.
-
— contains additional commands for working with data grids.
The window is used to add a new price schedule to the menu item.
Each price schedule panel has columns for the different times at which different prices apply, or during which the menu item will not be available for sale.
Note
Intervals of the price schedule can be changed in the directory window.
Stock item panel of the Menu item shortcut window
The Stock item panel is displayed when Stock item is selected in the Class field of the Properties panel.
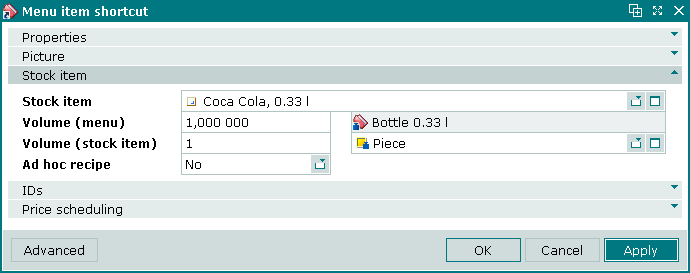
Stock item panel
Stock item panel fields:
-
Stock item — name of the stock item deducted from store when selling the menu item selected using its shortcut. Required field.
Note
Ideally the stock item should already be entered in the directory, but it can also be added via the stock item selection window.
-
Volume (menu) — menu item volume sold when its shortcut is selected. Required field.
The value corresponds to the volume specified in the Volume (stock item) field.
-
Unit (menu) — unit of measurement used for the menu item. Read only. Field name is not displayed.
The value specified in the field applies both to the menu item and to its shortcuts.
-
Volume (stock item) — volume of the stock item that equals to the volume of the menu item included in the customer order when menu item shortcut is selected. Required field.
The value defines the stock item volume to deduct from store when a certain menu item volume specified in the menu item shortcut is sold.
-
Unit (stock item) — name of the unit of measurement used for the stock item specified in the Stock item field. Field name is not displayed.
This field is automatically populated with the unit of measurement specified for the stock item in the directory.
Selection is made in the window. The selection window displays all units of measurement belonging to the same group in the directory as the unit of measurement that is specified for the stock item.
-
Ad hoc recipe — whether to query the amount when calculating the stock item deducted from store when the associated menu item is sold. Required field.
Selection is made from No and Yes. Default value is No.