© Tillypad 2008-2014
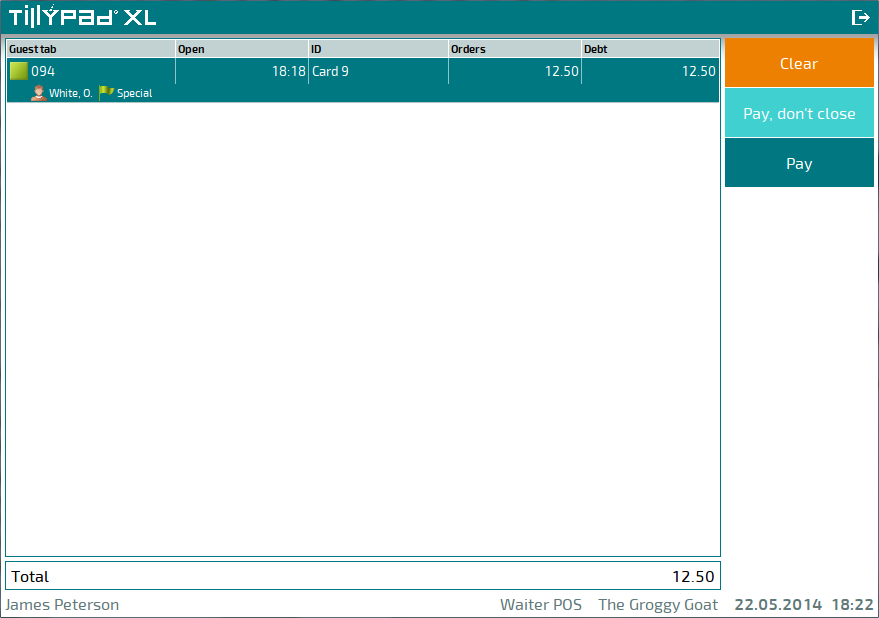
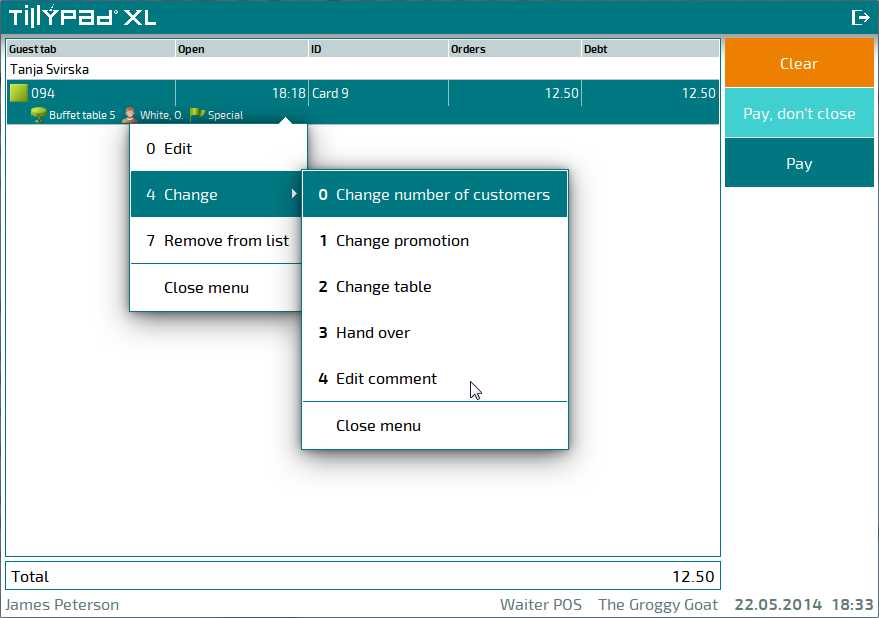
You can carry out the following operations on guest tabs:
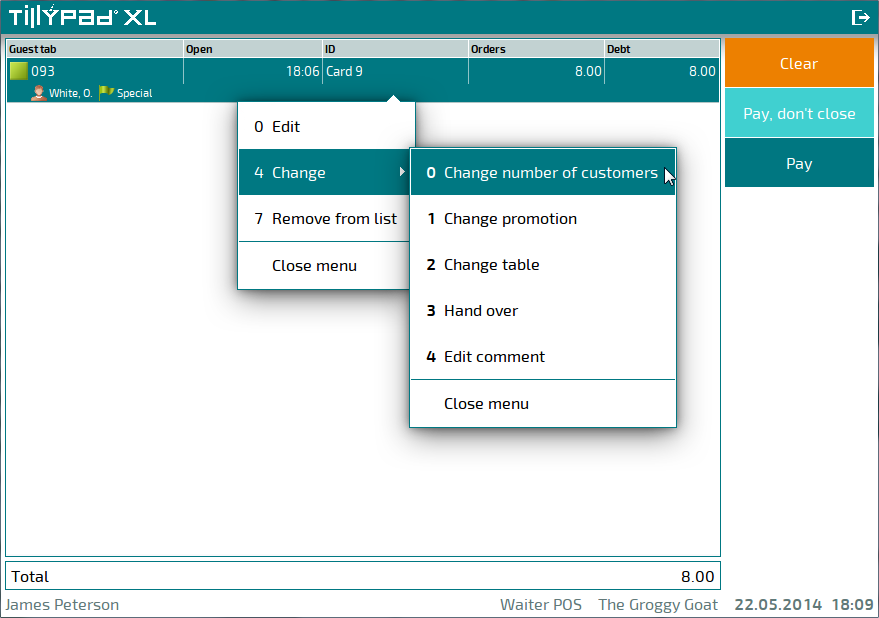
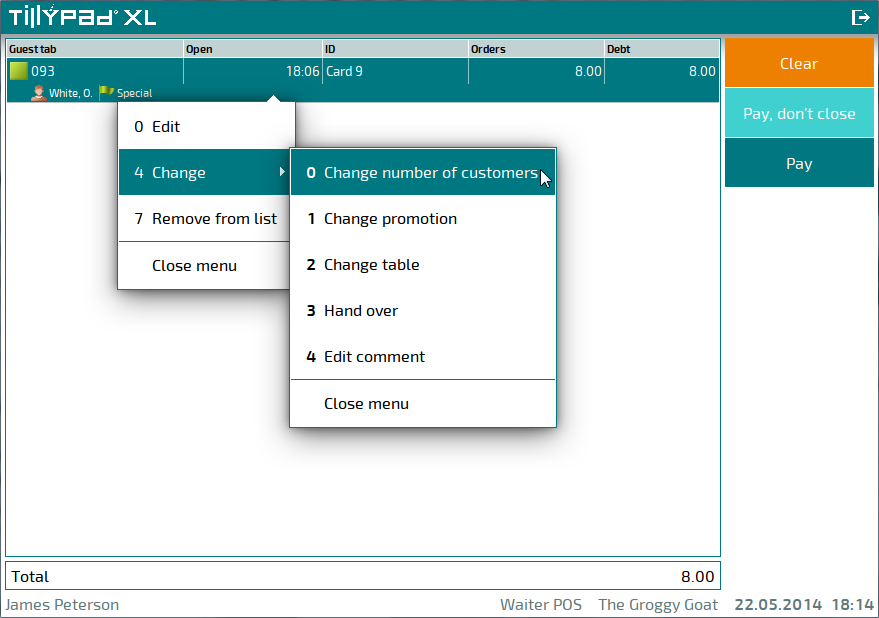
To perform these operations, select the corresponding commands in the submenu of the guest tab data grid context menu.
You can also change guest tab attributes on the guest tab management screen by using commands from the button menu.

Changing the number of guests served
To modify the number of customers served on a given guest tab, select the command from the context menu.
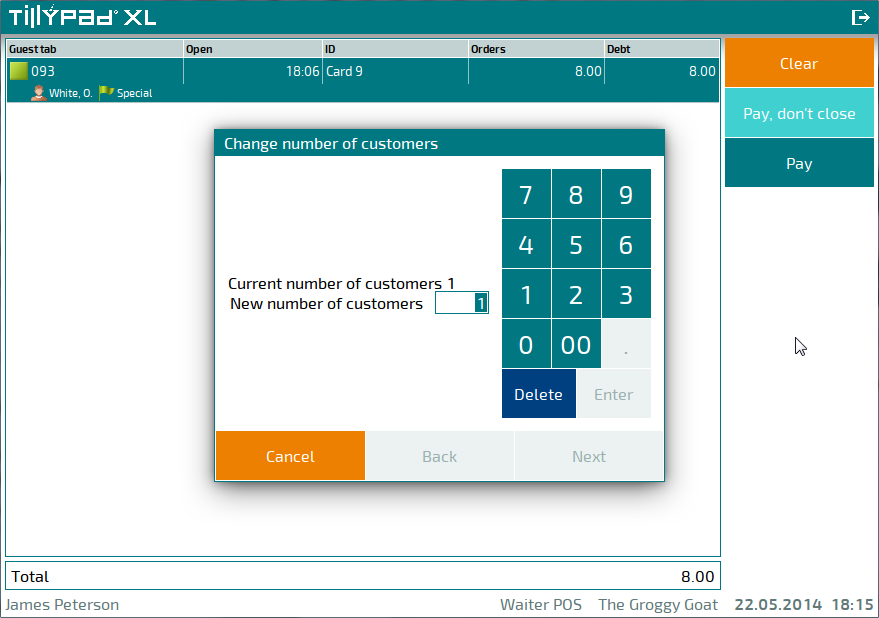
Enter the new number of guests in the window and press to continue the operation. If you decide that you do not want to change the number of customers, press .
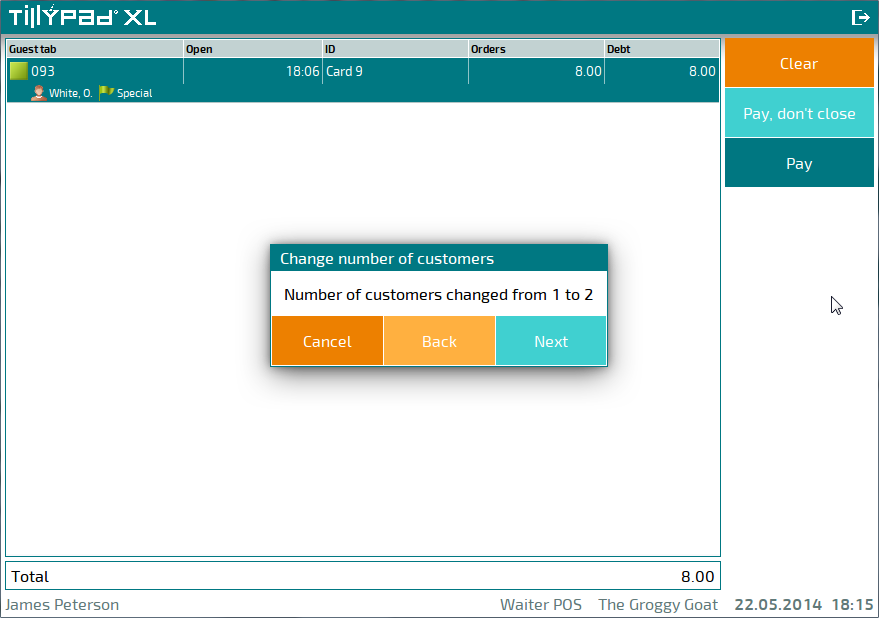
Press to confirm the modified number of guests. If you decide that you do not want to change the number of customers, press .
Indicate a reason for changing the number of customers. This reason will be logged in the log.
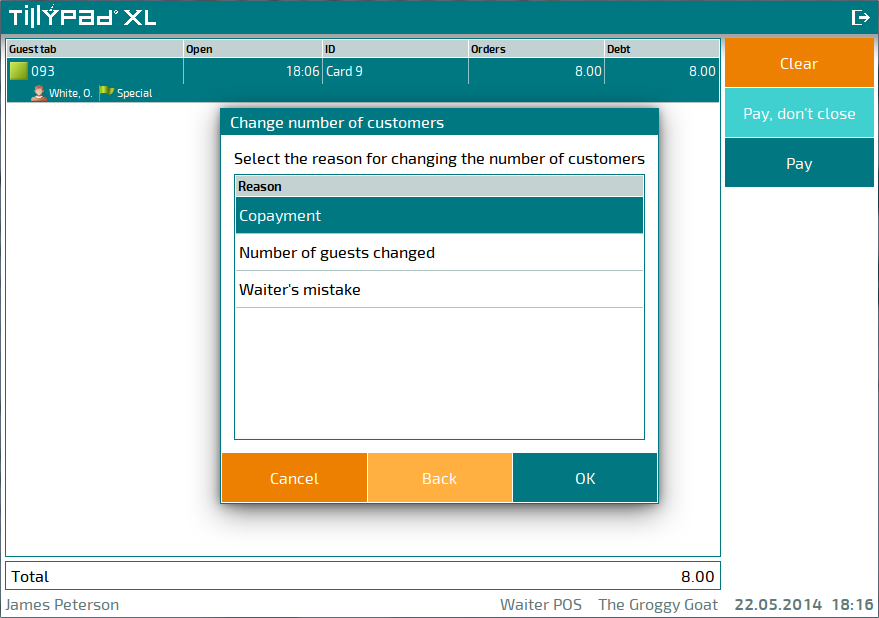
Press to continue. If you decide that you do not want to change the number of customers, press .
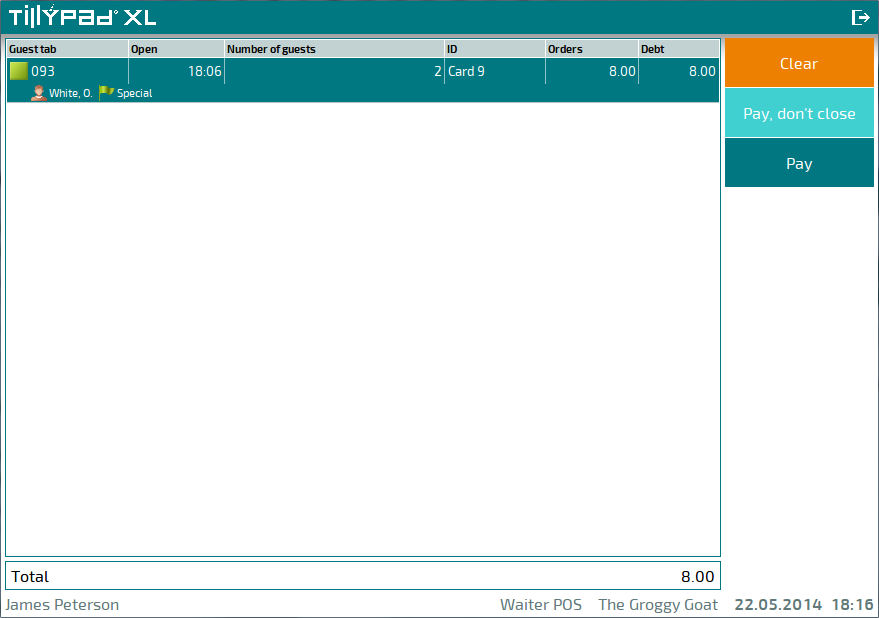
The viewing window for guest tabs will display the modified number of guests served on this tab. If multiple guests are served on one guest tab, the guest tab data grid will contain the Number of guests column.
Changing guest tab promotion categories
The promotion category of an order can be changed if the AllowOrderChangePrivilege parameter of mode is set to True.
To change the promotion category assigned to an order, select the order’s header and use the command from the context menu.
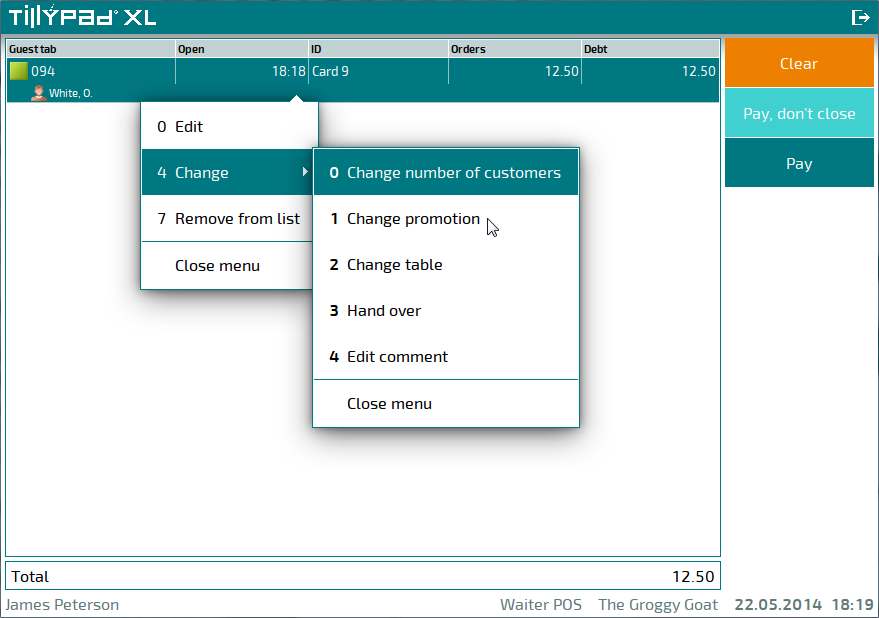
This will open a window where you can select another promotion category.

After you select the desired promotion category, a confirmation dialog window will open.
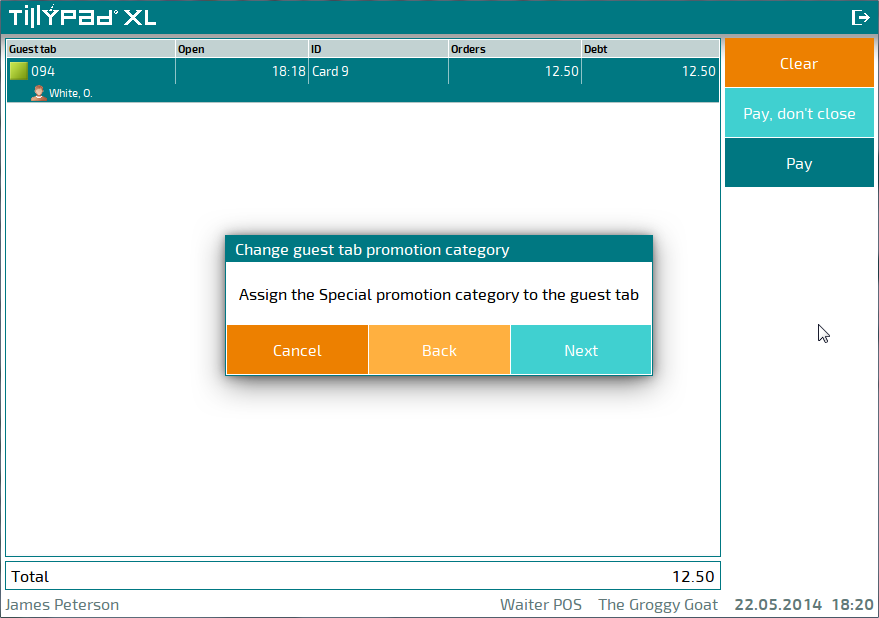
Press to confirm that you want to change the promotion category of the order. Pressing will return you to selecting a promotion category. Pressing will leave the promotion category of the order unchanged.
If the Confirm_OrderChangePrivilege parameter of mode is set to True, select a reason for changing the promotion category of the order.
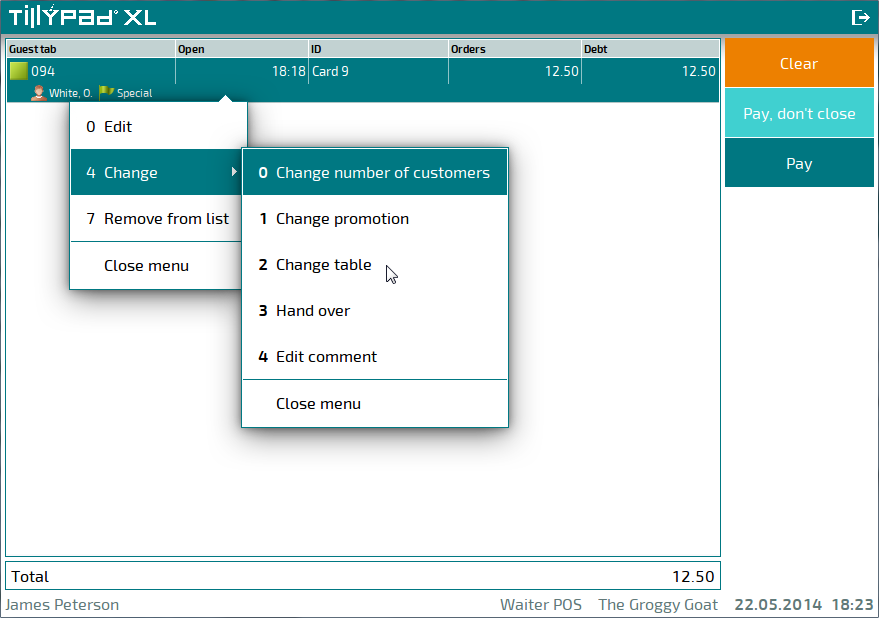
Changing a guest tab's table
To change the table in a guest tab, select the command from the context menu.
Select a new table in the window and press to continue. If you decide that you do not want to change the table, press .

Press to confirm that you want to change the table. If you decide that you do not want to change the table, press .

Indicate a reason for changing the table. This reason will be logged in the log.
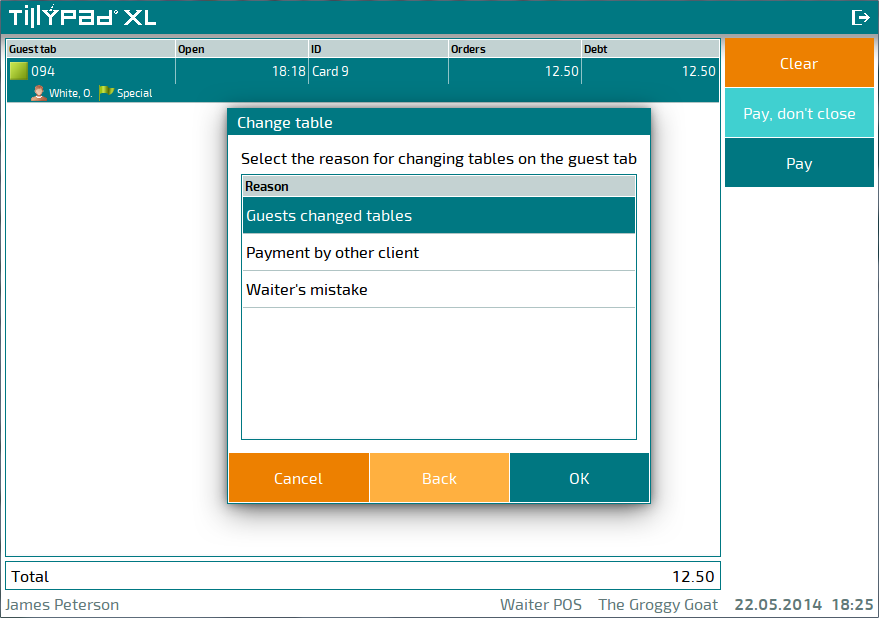
Press to continue. If you decide that you do not want to change the table, press .
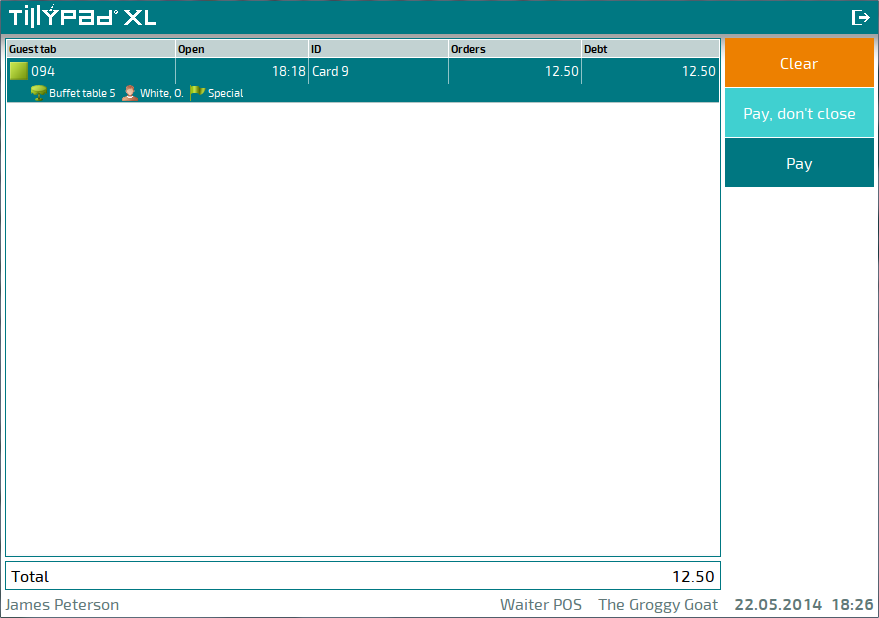
The name of the selected table will appear in the guest tabs data grid row..
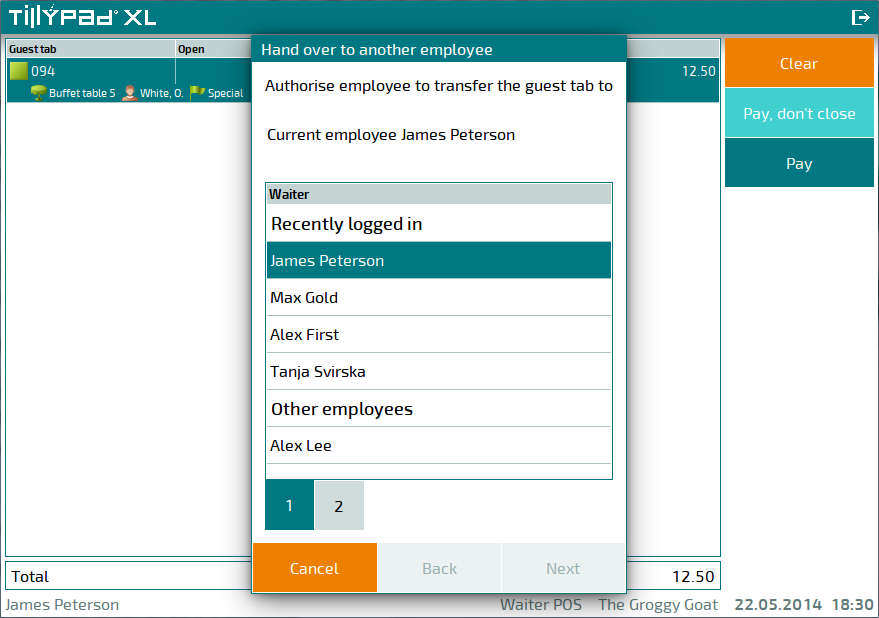
Changing the employee responsible for a guest tab
To hand over a guest tab to another operator (user), select the command from the context menu.

Select an employee in the window and press to continue. If you decide not to change the employee, press .
An employee authorisation dialog window will open.
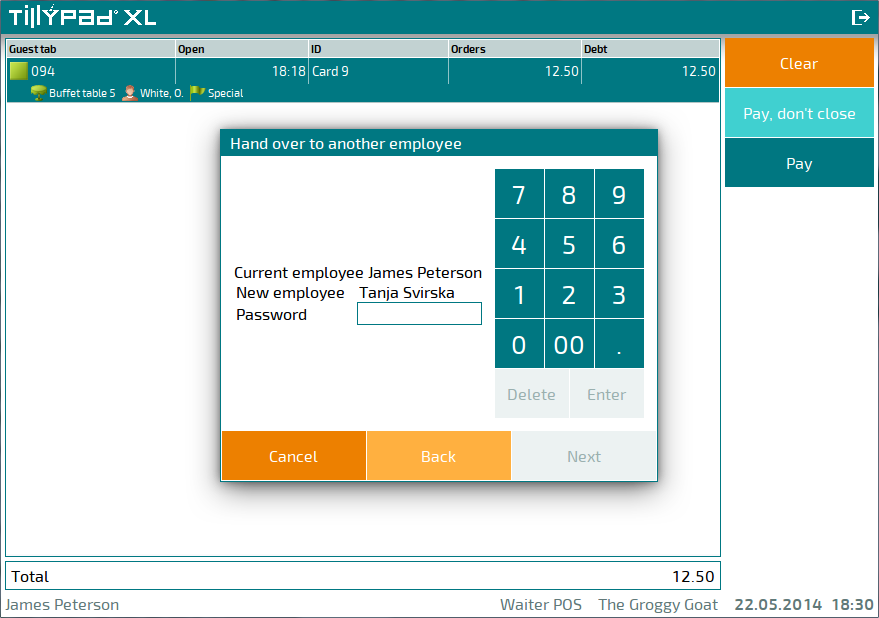
Enter the password of the employee who will now be responsible for the guest tab and press to continue. If you decide not to change the employee, press .
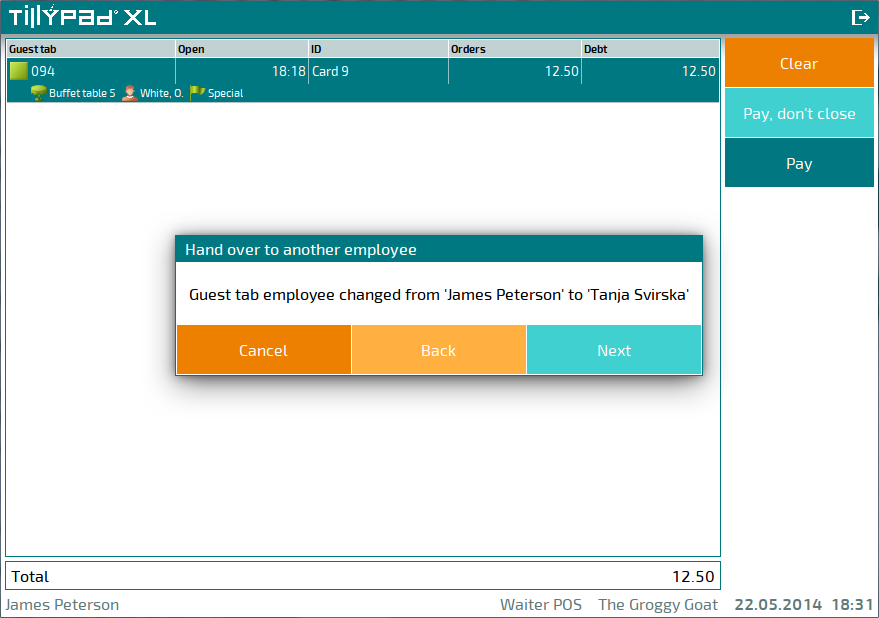
A confirmation dialog box will open and prompt you to confirm the change of employee.
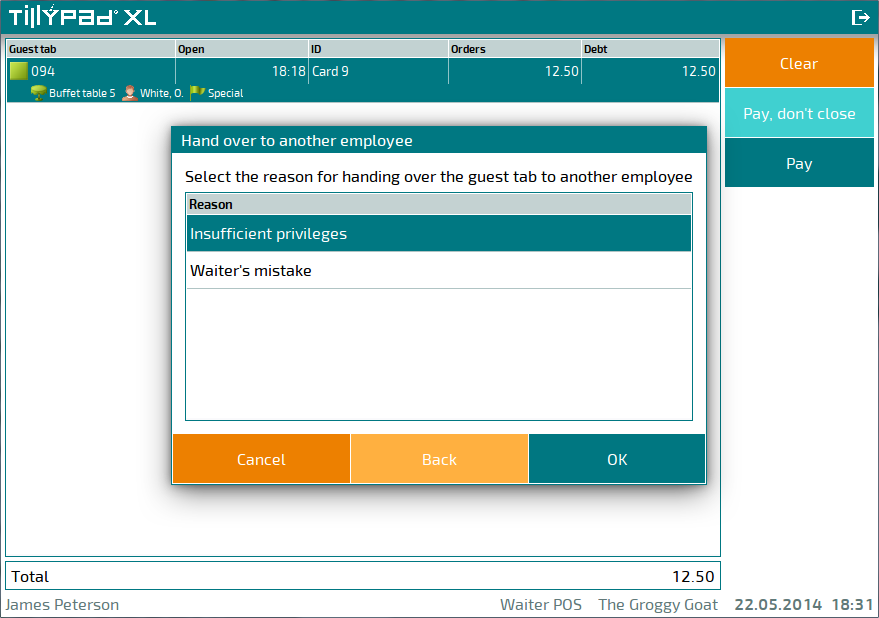
Indicate a reason for handing over the guest tab. This reason will be logged in the log.
Press to continue. If you decide not to hand over the guest tab, press .
If you press Next, the guest tab will be handed over to the selected employee.
Editing comments on a guest tab
To edit a comment on a guest tab, select the command from the context menu.
Using either the on-screen keypad or the keyboard connected to the POS terminal, enter a new comment.
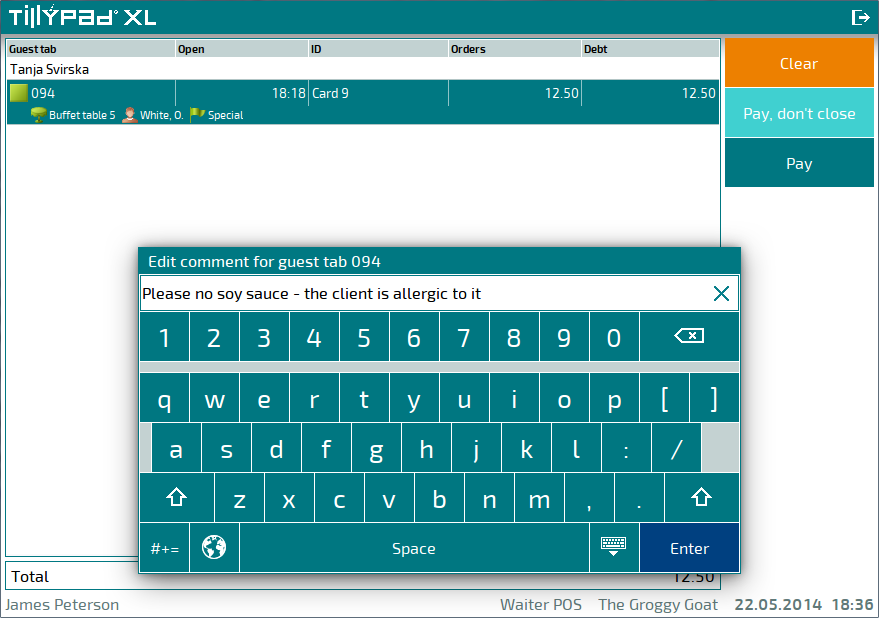
The new comment will appear in the guest tab data grid row.
