
© Tillypad, 2008-2015
Windows used to manage fiscal registrations:
All of these windows are opened from the data grid of the log.
You can open the editor window by using the command. From here, you can modify attributes of one or more fiscal registrations.
If one item is selected in the data grid, the editor window opens.
The editor window is composed of the Properties , Specification , and Payment specification panels.
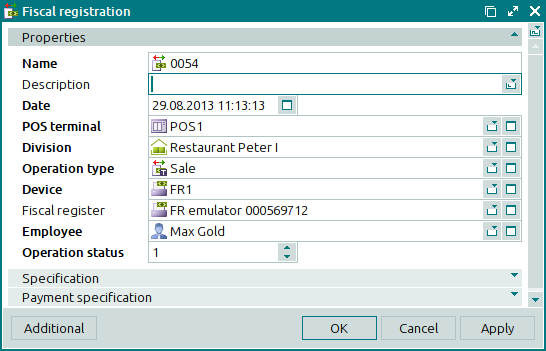
The Properties panel is composed of the following fields:
Name indicates the name of the fiscal registration. This is a required field.
The name of the fiscal registration is specified on the receipt.
Description is a brief text description of the fiscal registration.
Any additional information can be entered in this field.
Date is the date and time when the fiscal registration was carried out. This is a required field.
The date and time are automatically recorded when you create a fiscal registration, but they can be edited by the user.
POS terminal is the device (POS terminal) to which the fiscal register belongs. This is a required field.
Please select a device in the window from a list of devices that can be used as POS terminals.
Division indicates the name of the division where the fiscal registration was run. This is a required field.
Operation type is the type of the fiscal registration. This is a required field.
Here you must specify the type of the operation carried out on the fiscal register: Start shift, End shift (Z-report), Sale, Refund sale, Cash in, Payout, X-report, Purchase, or Refund purchase.
Fiscal registration types are created by the developer and cannot be edited. Please select a type in the window.
Device indicates the name of the fiscal register in the list of devices in the system. This is a required field.
Please select a device in the window from a list of devices that can be used as fiscal registers.
Fiscal register is the fiscal register on which the fiscal registration was carried out.
Employee is the Waiter who ran the fiscal registration. This is a required field.
Click to save data. Selecting will save data without closing the window. Selecting will close the window without saving data.
The multiple fiscal registrations editor window opens if two or more items are selected in the data grid.
The name of the window changes to . A panel with a list of the selected items is added to the editor window.
The fields and panels are similar to those in the window.
The entry window allows you to add details of one or more new fiscal registrations to the list.
You can open the entry window by using the command or by pasting one fiscal registration from the clipboard.
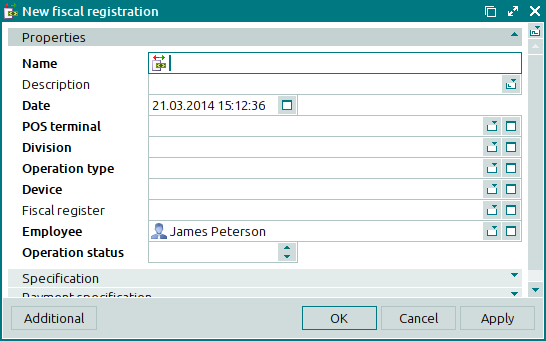
The fields and panels are similar to those in the window.
You can open the entry window by pasting details of two or more fiscal registrations from the clipboard to the list.