- 1 How to set up payment for employee meals using accounts
- 2 Adding a POS terminal
- 3 Add a payment setting
- 4 Creating IDs for employees
- 5 Assigning IDs to employees
- 6 Adding a regular customer account type
- 7 Adding employees to the list of regular customers
- 8 Creating a report to be distributed to employees
- 9 Creating a task to distribute reports to employees
© Tillypad, 2008-2015
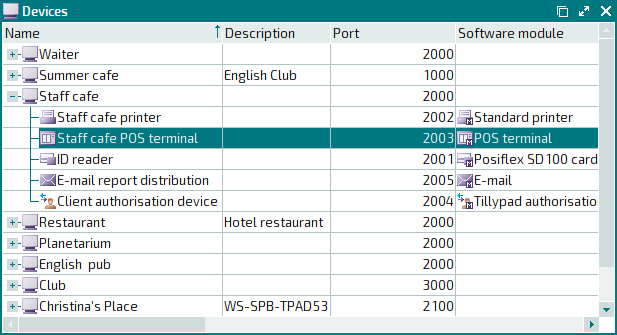
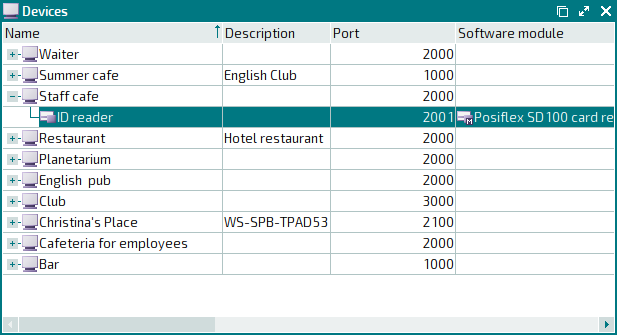
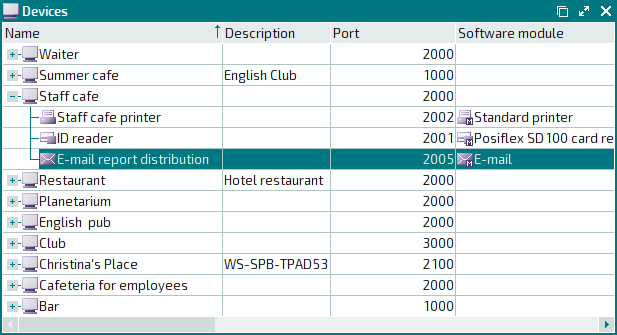
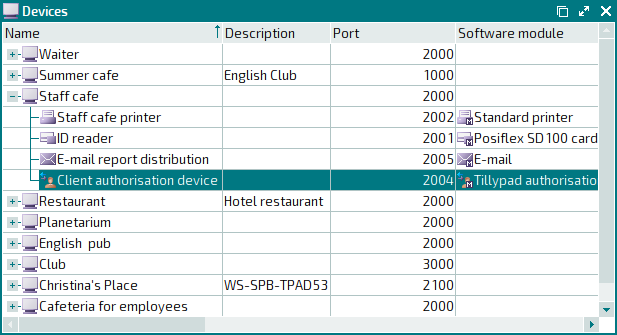
At this stage, you need to create a new device loader in the directory. This loader will connect to an ID reader, a printer, a regular customer authorisation device, a device for sending e-mail reports, and a POS terminal. These devices will be used when meals are served in the staff cafeteria.
Adding a device loader
To add a device loader, select the command from the context menu of the directory. An entry window will open. Fill out the fields in the Properties panel.
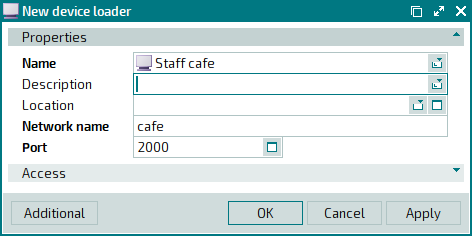
Press . The entry window will close, and the new device loader will be added to the directory.
On this terminal, a POS terminal, authorisation device, printer and fiscal register will be used.
Adding an ID reader
To add an ID reader, select the command from the context menu of the directory. An entry window will open. Fill out the fields in the Properties panel.
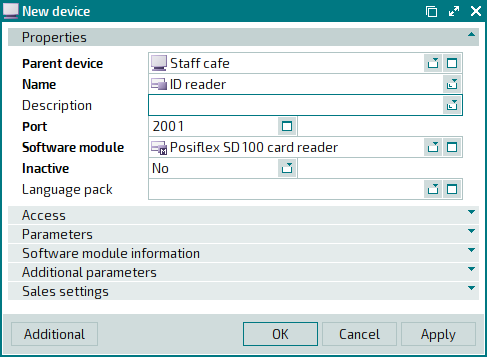
Click on the Parameters panel to expand it, and enter the required device parameter values.
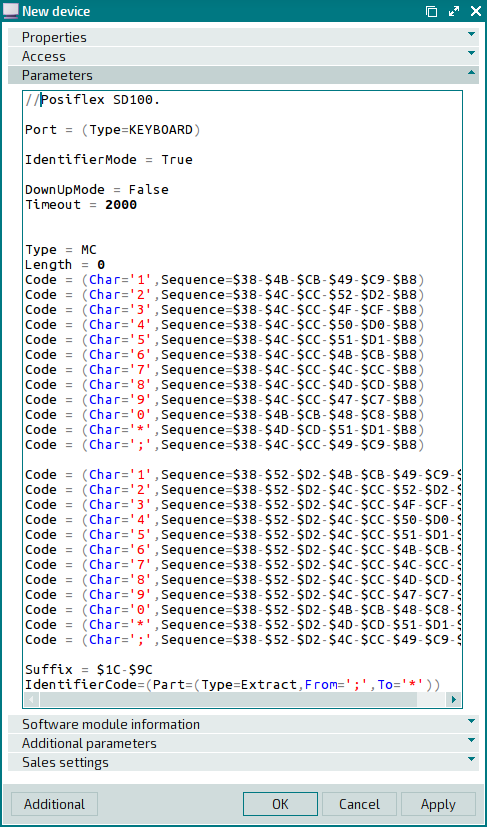
Press . The entry window will close, and the device will be added to the directory.
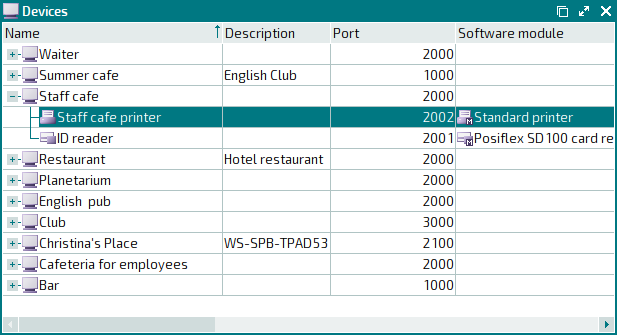
Adding a printer
To add a printer, select the command from the context menu of the directory. An entry window will open. Fill out the fields in the Properties panel.
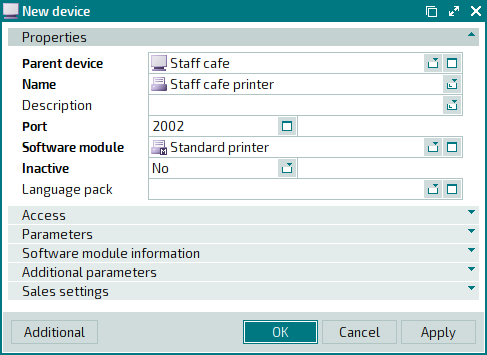
Press . The entry window will close, and the device will be added to the directory.
Adding a device to distribute e-mail reports
To add a device that allows you to send e-mail reports to employees, select the command from the context menu of the directory. An entry window will open. Fill out the fields in the Properties panel.
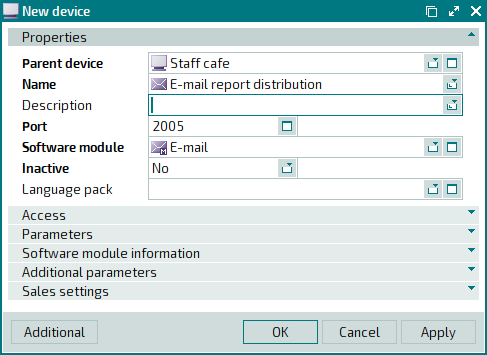
Figure 25.8. Result of entering the main attributes of the device that will distribute reports to employees
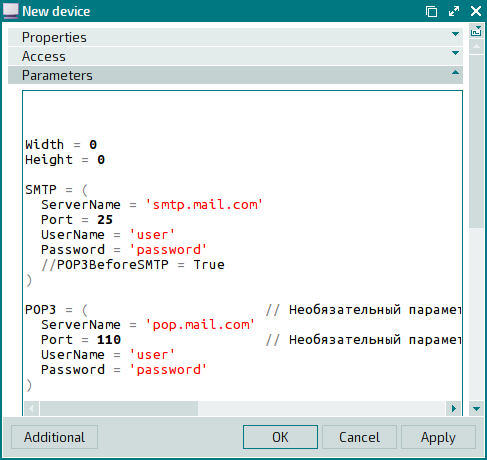
Click on the Parameters panel to expand it, and enter the required device parameter values.
Press . The entry window will close, and the device will be added to the directory.
Adding a regular customer authorisation device
To add a regular customer authorisation device, select the command from the context menu of the directory. An entry window will open. Fill out the fields in the Properties panel.
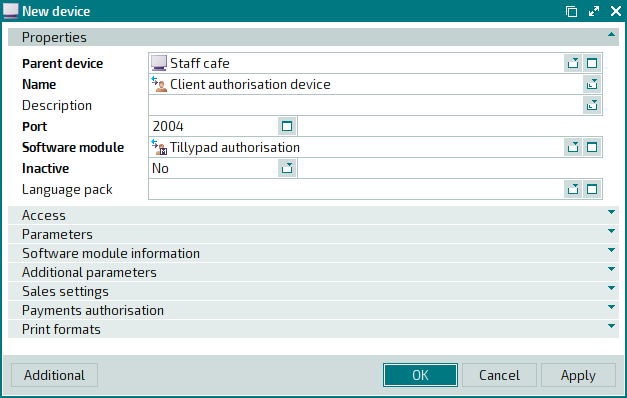
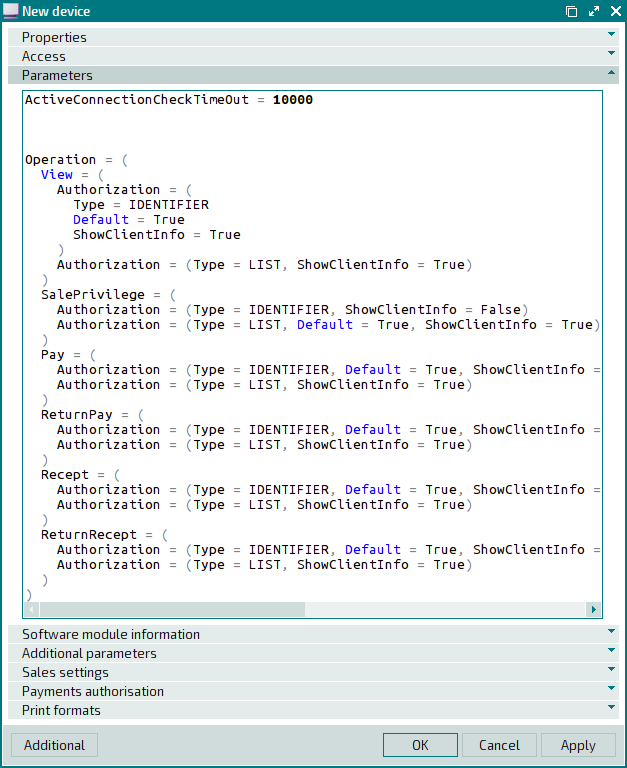
Click on the Parameters panel to expand it, and enter the required device parameter values.
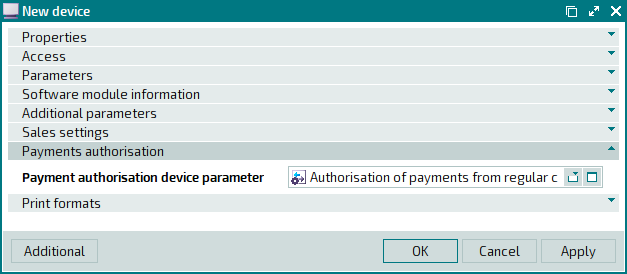
To continue working, expand the Payment authorisation panel. Select the payment authorisation device parameter that will be used during authorisation of payments from regular customer accounts on the current device.
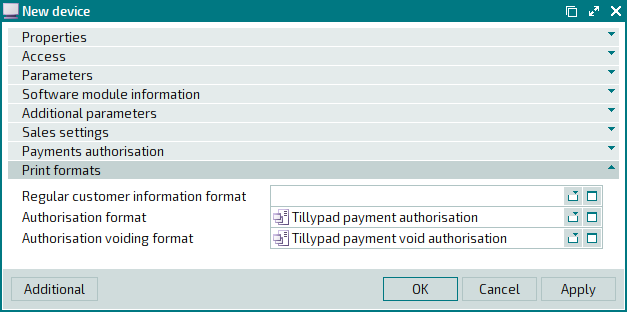
Now expand the Formats panel. Select print formats for the authorisation receipts and authorisation cancellation receipts that will be produced when authorisations are carried out on this device.
Press . The entry window will close, and the device will be added to the directory.
Adding a POS terminal
To add a POS terminal, select the command from the context menu of the directory. An entry window will open. Fill out the fields in the Properties panel.

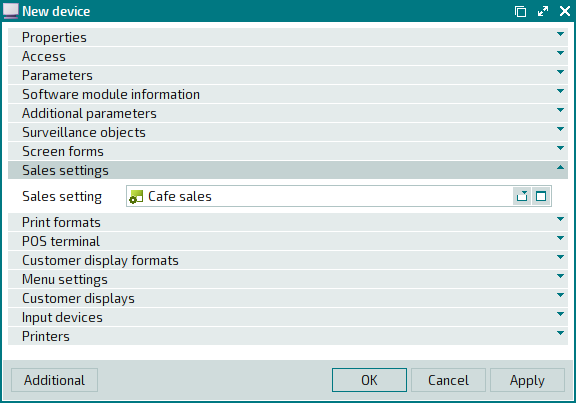
Now expand the Sales setting panel. Select the sales setting that will be used on this terminal.
Now expand the POS terminal panel. Select the division to which the employee cafeteria terminal belongs.

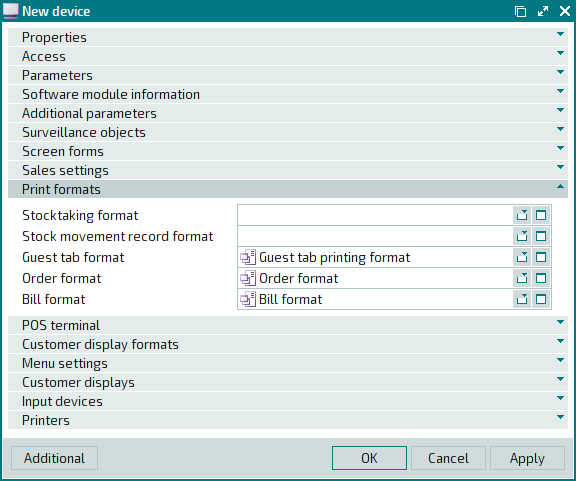
Now expand the Print formats panel. Select the print format that will be used to print orders at this point of service.
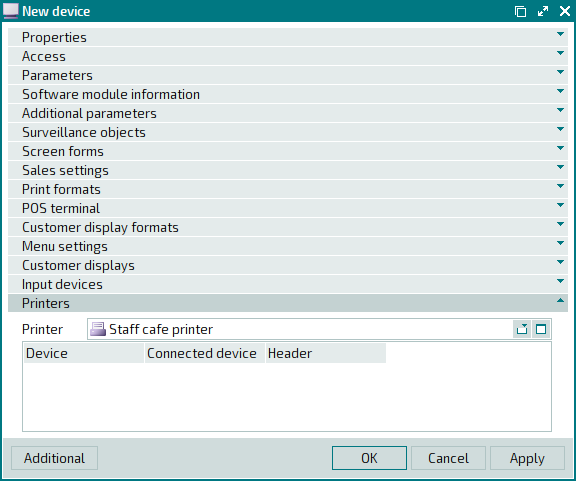
Now open the Printers panel. Select the main printer for this POS terminal.
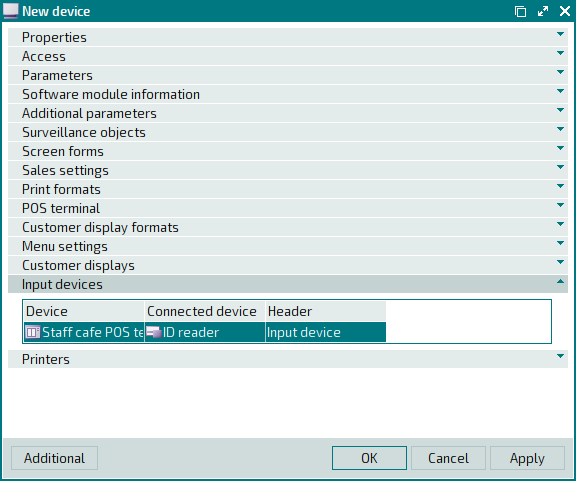
Now expand the Input devices panel. To add an input device to read IDs, select the command from the context menu. In the entry window, select the ID reader device.
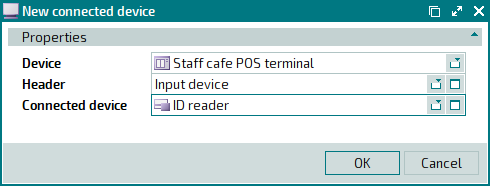
Press . The entry window will close, and the new input device will be added to the directory.
Press . The entry window will close, and the device will be added to the directory.