
© Tillypad 2008-2014
Windows used with sales parameters:
All of these windows are opened from the context menu of the directory.
The editor window is opened by using the command from the context menu when one or more sales parameters are selected.
If one sales parameter is selected, the editor window will open. The window is composed of the Properties and Access panels.
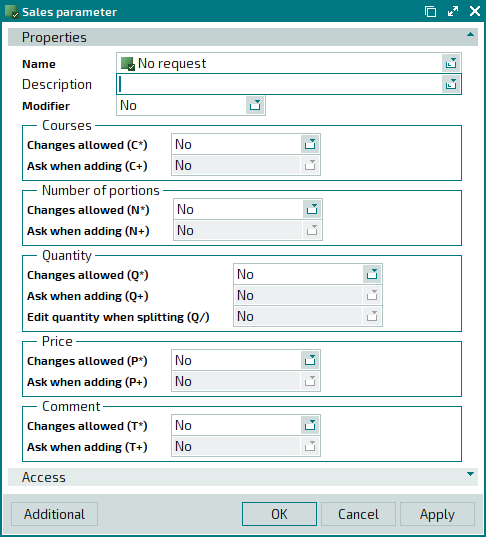
The Properties panel is composed of fields and groups of fields that allow sales parameters to be adjusted.
The "*" symbol denotes that adjustments can be made only when you are editing the item after it has been added to an order.
This symbol shows which fields will be open for changes when the menu item in the order is being edited.
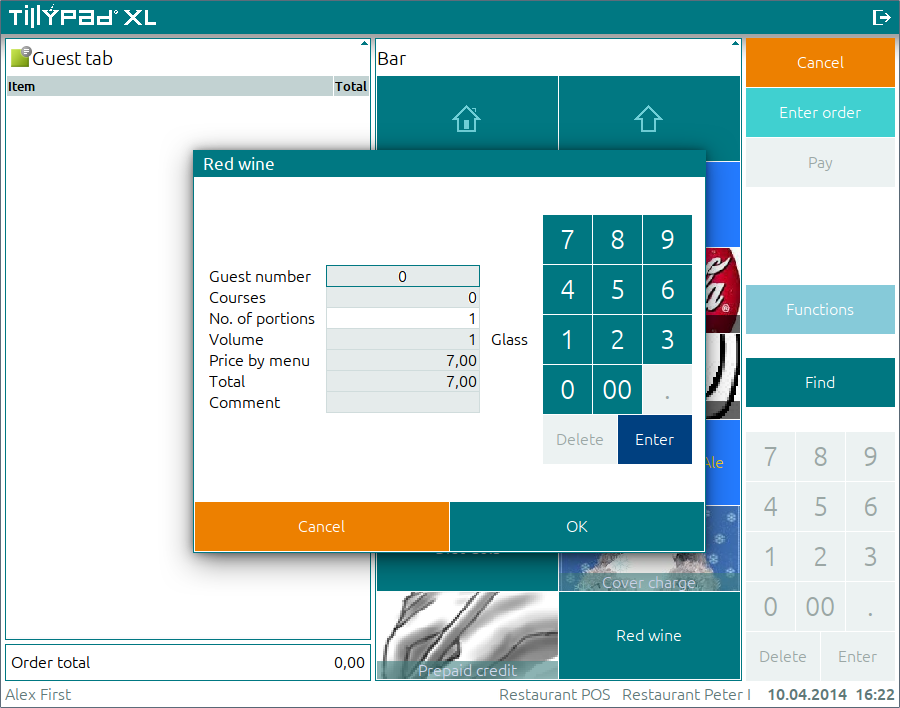
Figure 5.78. Availability to edit the number of portions of a menu item when it is added to an order
The "+" symbol denotes that adjustments can be made when the item is added to an order.
If a setting with the "*" symbol is marked as No, then its equivalent setting with the "+" symbol cannot be selected.
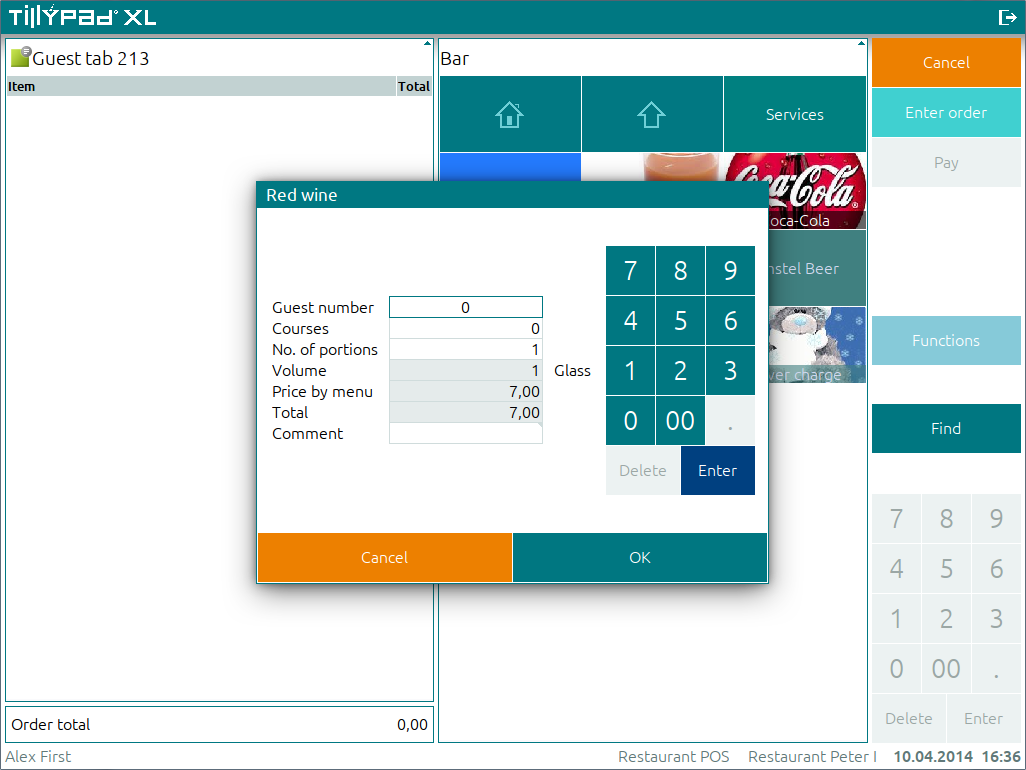
Figure 5.79. Editing the number of portions, quantity, prices, and comments for a menu item previously entered into an order
Name indicates the name of a given sales parameter. This is a required field.
Sales parameters are specified for menu items and draft menu items.
Description is a brief description of the sales parameter.
Any additional information can be entered in this field.
Modifier indicates that the menu item is to be used as a modifier. This is a required field.
You can choose between Yes and No.
If Yes is selected, the menu item cannot be sold on its own. It can be selected in the POS terminal menu only as a modifier for another menu item. The Yes option is set if the menu item is to be a modifier. If Yes is selected, the Courses setting will be disabled because the modifier cannot be served separately. This setting can only be specified for primary menu items.
For modifiers, the Number of portions, Quantity and Price fields are not usually configured.
Courses is the group of fields to indicate the order in which menu items should be served. In each field, you can select between Yes and No.
Changes allowed (C*) allows the menu item’s place in the serving order to be adjusted. This is a required field.
If it is set to Yes, the course will initially be 1 but can be adjusted after the menu item has been added to an order.
If it is set to No, the course will always be listed as 1 and cannot be adjusted by the terminal operator.
Ask when adding (C+) defines whether you will be able to indicate the course when the menu item is added to an order. This is a required field.
This field is enabled only when the value in Changes allowed (C*) is set to Yes.
If it is set to Yes, the POS terminal will automatically display the Courses field when the menu item is added to an order.
If it is set to No, the course will be listed as 1 when the menu item is added to an order, but it can be adjusted by the terminal operator.
Number of portions is a group of fields to indicate the number of portions of the menu item to be added to an order. In each field, you can choose between Yes and No.
Changes allowed (N*) allows the number of portions of the menu item to be adjusted. This is a required field.
If it is set to Yes, the number of portions will initially be 1 but can be adjusted after the menu item has been added to an order.
If it is set to No, the number of portions will always be 1 and cannot be adjusted by the terminal operator.
Ask when adding (N+) defines whether the number of portions will be specified when the menu item is added to an order. This is a required field.
This field is enabled only when the value in Changes allowed (N*) is set to Yes.
If it is set to Yes, the POS terminal will automatically display the Number of portions field when the menu item is added to an order.
If it is set to No, when the user adds the menu item to an order, he/she will not be prompted to enter the number of portions.
Quantity is a group of fields to indicate the quantity of the menu item added to the order. In each field, you can choose between Yes and No.
Changes allowed (Q*) allows the quantity of the menu item to be adjusted. This is a required field.
If it is set to Yes, the initial quantity will correspond to the amount in a single portion, but can be adjusted after the menu item has been added to an order.
If it is set to No, the quantity of the menu item will always be as defined in the directory and cannot be adjusted by the POS terminal operator.
Ask when adding (Q+) defines whether the quantity will be specified when the menu item is added to an order. This is a required field.
This field is enabled only when the value in Changes allowed (Q*) is set to Yes.
If it is set to Yes, the POS terminal will automatically display the Quantity field when the menu item is added to an order.
If No is set to the field, when the user adds the menu item to an order, he/she will not be prompted to enter its quantity.
Edit quantity when splitting (Q/) allows the menu item's quantity (weight, volume, time) to be indicated when the guest tab is split. This is a required field.
If you select Yes, you will need to specify which part of the menu item's quantity will be transferred to the new guest tab.
If No is set in the field, the menu item's quantity will not be divided when the guest tab is split.
Price is a group of fields to indicate the price of the menu item. In each field, you can choose between Yes and No.
Changes allowed (P*) allows the price of the menu item to be adjusted. This is a required field.
If it is set to Yes, the initial price will be that specified for the menu item in the directory, but it can be adjusted after the menu item has been added to an order.
Selecting No will mean that the price of the menu item will always equal the price established in the directory. It cannot be edited by the POS terminal operator.
Ask when adding (P+) defines whether the price will be specified when the menu item is added to an order. This is a required field.
This field is enabled only when the value in the Changes allowed (P*) field is set to Yes.
If it is set to Yes, the POS terminal will automatically display the Price editor field when the menu item is added to an order.
If the value is set to No, when the user adds the menu item to an order, he/she will not be prompted to enter a price.
Comment is a group of fields for entering comments on the menu item. In each field, you can choose between Yes and No.
Changes allowed (T*) allows the text comment on the menu item to be edited. This is a required field.
If it is set to Yes, a comment is not required initially but can be entered after the menu item has been added to an order.
If it is set to No, the POS terminal user cannot enter any comments on the POS terminal.
Ask when adding (T+) defines whether the text comment will be created when the menu item is added to an order. This is a required field.
This field is enabled only when the value in Changes allowed (T*) is set to Yes.
If it is set to Yes, the POS terminal will automatically display the Comment editor field when the menu item is added to an order.
If it is set to No, when the user adds the menu item to an order, he/she will not be prompted to insert a comment.
Click to save data. Selecting will save data without closing the window. Selecting will close the window without saving data.
When two or more sales parameters are selected for editing, the multiple editor window will open. The name of the editor window changes to , and a panel with a list of the selected items is added to the window.
The panels and fields are similar to those in the editor window.
The entry window is used to add one or more new sales parameters to the directory.
You can open the entry window by using the command or by pasting one sales rule from the clipboard.
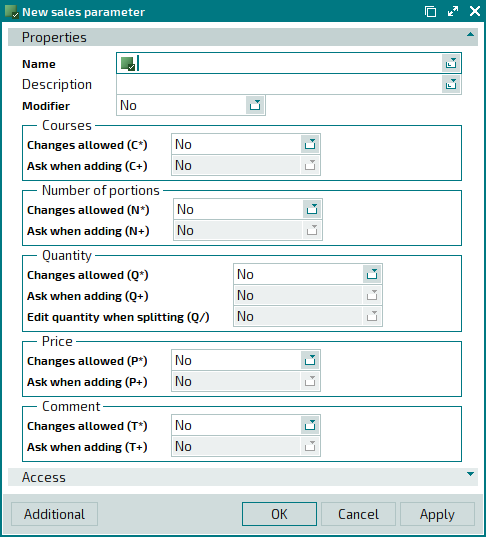
The panels and fields are similar to those in the editor window.
The multiple entry window opens when you select more than one element from the clipboard. Then a panel with a list of the selected menu items is added to the window, and its title changes to .
The panels and fields are similar to those in the editor window.